Getting started
Welcome to Flowie for Bitbucket Cloud!
Flowie is a Bitbucket Cloud app that enhances your pull request workflow with a rich set of core and plugin-based features, all easily enabled and configured to fit your needs.
Installation
The easiest way to install Flowie on your Bitbucket Cloud is by following the steps below:
-
Click on the button below to connect Flowie to your Bitbucket account:
-
Choose the workspace that should be used for the installation and click ‘Grant access’.
-
Now that Flowie has been installed, you need to configure it to enable its features.
Configuring Flowie
Once installed successfully, there will be a new section for Flowie on the current ‘Workspace settings’ side menu. Go to the configuration page by clicking on ‘Flowie > Configuration’.
On your first access, you will be prompted with access request for the app. Click ‘Review’ and then ‘Allow’ - these are the required permissions for Flowie to be able to work on the workspace.
You should see the Welcome screen.

- Click on ‘Create configuration’ button to proceed.

A default configuration script is created for you. You can change the configuration later once you are familiar with the configuration script and features. For now, let’s keep the default, which will enable draft pull requests, Flowie’s powerful merge capabilities, enforced merge checks, and a few sample labels.
- Select a ‘Scope’:
You can search for the scope to which you are applying the configuration.
- Click on the ‘Apply’ button
If changes to the branch permission are required, Flowie will display a message about the changes.
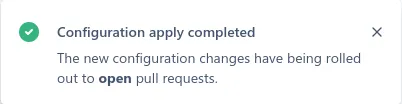
If everything went well you should see the message above.
You are ready to use Flowie! 🎉
Using Flowie
- Go to a pull request, and you should see the new ‘Labels’ panel on the right side.
Notice how the extended checks have a passing check ‘No work in progress’.
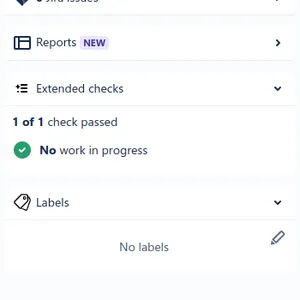
Since all checks are currently passing, you should also see the message with the ‘Merge …’ button.

-
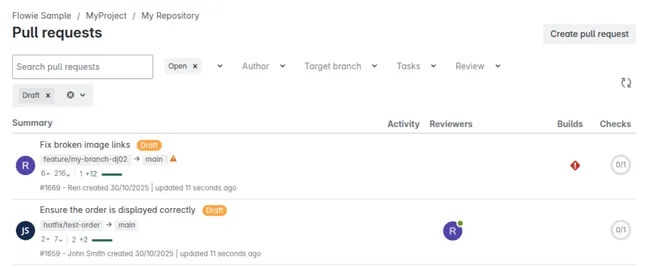
Add the ‘Draft’ label to the pull request by clicking on the edit button at the top right and selecting it in the dropdown. (New pull requests will have the draft label automatically added by default)

The pull request should now be marked as draft and the check is no longer passing.

Also, the option to merge the pull request will no longer be available.
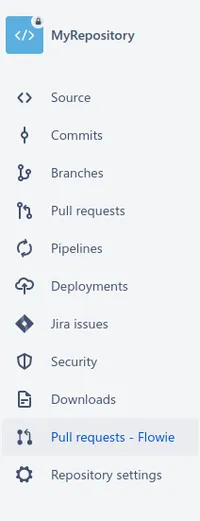
- On the left side navigation menu, go to Flowie’s enhanced pull request search page, by clicking on ‘Pull requests - Flowie’ (you might need to reload Bitbucket for the option to appear on the side menu).
- You should see and be able to filter the pull request with the label you have added.
Thanks for trying Flowie!
You can explore the documentation to learn more about the features and how to enable or tweak them. If you have any suggestions or need assistance implementing your workflow, please reach out to us at support@flowie.app.